Just a super quick one today, so that I don't forget this cute little stage Jacob is in:
His most frequently used response to every question right now is "maybe," Or, "Maybe, but..." Picture virtually any question you could ask a two-year-old, and think about how the answer "maybe" would sounds. It leads to some funny moments.
For example, yesterday he was giving me a "check-up" during a play date at his friend's house, and I asked if I had a heartbeat. He goes, "Maybe, but I don't think so." Ha! I told him I'm pretty sure I do ;)
He also uses "maybe" and "how about" to give commands disguised as suggestions, like, "Maybe you should clean me up." Or, "How about we go outside." It sounds so cute and polite, but he's really trying to become a tiny dictator in this house!

adventures in daily living, loving, and creating
Tuesday, September 30, 2014

Tuesday, September 16, 2014
Toddler Truths Tuesday
It's Tuesday, and I've got a couple of good ones to share! I'm bummed because I know there at least two more stories that were SO funny, but now I can't remember them! Which reminds of why I like to record these little snippets of Jacob's toddlerhood here. Enjoy!
---
I was putting Jacob in his carseat and somehow he started talking about my tummy and how he used to be in it (I think he was thinking about this because we had looked at some of his newborn photos the day before)...
I said, "Yep, you were in my belly."
He then jumped in and exclaimed, "Then I was borned. Like Baby Jesus, in my book!"
---
Over dinner, we were singing songs Jacob likes (like Old MacDonald) and making up silly versions with different words. He wanted to join in the fun, so he said:
"I have another song. It's about...(long pause while he thinks)...me, me me, me, MEEEEEEE!"
A perfect example of toddler egocentrism ;)
---
I was putting Jacob in his carseat and somehow he started talking about my tummy and how he used to be in it (I think he was thinking about this because we had looked at some of his newborn photos the day before)...
I said, "Yep, you were in my belly."
He then jumped in and exclaimed, "Then I was borned. Like Baby Jesus, in my book!"
---
Over dinner, we were singing songs Jacob likes (like Old MacDonald) and making up silly versions with different words. He wanted to join in the fun, so he said:
"I have another song. It's about...(long pause while he thinks)...me, me me, me, MEEEEEEE!"
A perfect example of toddler egocentrism ;)
Friday, September 12, 2014
Fall Fun: A Mommy & Me Craft


Here's a full disclaimer to start! I got these ideas from the blog Housing a Forest, and I followed her great tutorials, found here and here. I'm just sharing my own photos of the process and result! It was a really fun way to get excited about fall and start decorating our home, with Jacob's help :)
Okay, here are the steps:
 |
| Make paper pulp! Have your little one help rip up construction paper into tiny pieces, put them in separate containers (by color -- we combined some red paper with orange paper to make a darker orange). We used about 4-5 sheets of paper per color, but it was much more pulp than we needed! More fun for playing in, though ;) Pour boiling water on the pieces and let them sit for at least an hour (a couple would work even better) to break down the paper fibers. Then, blend the wet paper pieces (one color at a time) in the blender to create the pulp. |
 |
| Find some sticks and rocks (or mulch) in the yard; this is another fun step for getting little ones involved! Arrange them in an empty, clean soup can (or a mason jar, vase, basket with floral foam, etc....up to you!). |


Our "tree" and my little helper ready to go! I knew the pulp would be messy, so I layered Jacob with a smock-style bib and his little apron. I was glad to have done so ;)
 |
| Testing out the pulp -- he wasn't sure at first! This part is why this craft is perfect for toddlers and small children. Even if they can't quite make the "leaves" on the tree, they get to tear up paper, search for sticks, and PLAY in the wet, mushy pulp! |
 |
| He quickly warmed up and got his hands dirty (SO literally)! |
 |
| I didn't get pictures of the actual leaf creation, because I had to either help Jacob make his leaves or make them myself while guarding the tree from him ;) To make leaves, just squeeze little bits of pulp onto the ends of the sticks. Squeeze out enough water that the pulp stays on the sticks (this part will be messy!). Try not to be "perfect" in size or color distribution -- your tree will look more realistic if it's random. |
 |
| What the finished tree looks like while wet. Ideally, place it outside in the sun for several hours to dry. If it is cloudy and/or windy, just set it somewhere out of children's reach. It will take a couple of days to dry fully. |
 |
| Once the tree is dry, you can spruce up the can by wrapping it with burlap (or fabric, ribbon washi tape, etc.!). |
 |
| The paper "leaves" look really unique and beautiful when dry. |
 |
| a close-up view |
 |
| And, here's another part where I couldn't take photos because I needed to help! After making our tree, we used more of our paper pulp to make these cute leaf hangings/ornaments. All you need is the same pulp colors, a leaf-shaped cookie cutter (could also do a pumpkin, etc.), and a cookie sheet covered in waxed paper! The tutorial from Housing a Forest recommends using a squeeze of glue in with the pulp for this craft, but I decided to try it without. I pictured the messy, sticky pulp becoming even stickier and wasn't brave enough! It still worked just fine, though. Simply have your child squish the pulp into the cookie cutter (no pattern or order needed!), and help them flatten it down and squish out as much excess water as possible. Use a skewer, lollipop stick, or something similar to make a hole in each leaf. Then, let them dry on the wax paper -- this will take a LONG time (several days to a week). You can sop up a little excess water with a paper towel to help speed up the drying. Finally, tie on a hanger (use twine, ribbon, or yarn), and display as desired! |
Wednesday, September 3, 2014
Dining Room Makeover
Over the last six-plus years of home ownership, we've completed countless updates and decorating projects to make our house into our home. One room that I've long wanted to work on but continually moved to the bottom of the list is the dining room. This was because it was technically "done." By this, I mean that there was a full set of matching furniture. We purchased it as newlyweds through family friends because it was a great deal for an entire, matching set of dining room furniture, including a huge hutch. I wanted somewhere to store my china and such -- that's a rite of passage for newly-married women, right?? BUT, I never really loved the furniture. I didn't hate it (I mean it was nice quality), but definitely didn't love it. I did hate the burgundy carpet that we lived with for six years, though (although not quite as much as the hunter green carpet upstairs) ;) Anyway, here is the room before:

It was dated, dark, and very traditional. This past March, we finally got new carpet downstairs (we had already replaced the green upstairs before Jacob was born) -- yay! Then, a couple of months later, we inherited a really cool 70-80 year old cabinet from hubby's grandma's estate and decided to make it into a wine cabinet (he did all the designing and work on that!). With the carpet and the spruced-up antique cabinet, I just got an itch to makeover the whole room!
We agreed we wanted something eclectic (not an entire matching set as we had desired when we first bought the house) and we were going for a sort of shabby-chic/modern farmhouse style. We didn't want the dining room to be too formal or stuffy, where we'd only use it for holidays (as in the before picture!). We wanted family-friendly, but also stylish and classy. I scoured Pinterest for a couple of months, and then we found a great deal on furniture. We ordered pieces from three different collections (from Ashley Furniture) to achieve the eclectic look we were going for, and paired them with a DIY console table update and the wine cabinet we had already revamped. We also added two upholstered dining chairs from Overstock.com. Next, we added an accent wall with reclaimed paneling from hubby's parents' house (originally installed in the 1950's -- we stained the back of the boards). Finally, I got to arrange and accessorize! Here's the end result:
 |
| Ta da!! |
 |
| And some other views. We're SO happy with it! It is calm, inviting, casual, eclectic, and rustic yet chic...if I do say so myself ;) |
 |
| Here are a bunch of close-ups of the details. We all know that decorating is all in the details! We decorated on a budget! The wine cabinet, Ball jars, and cast-iron pans are antiques from hubby's Grandma. The cute, personalized pillows were made by my mother-in-law. The wall wine rack was super-cheap from Kohls. The painting is from World Market. The console table was free from friends and revamped (see below)! I made the cork tray. The light fixture was a bit of a splurge (from Lowes), but much cheaper than similar versions we were eyeing (like one from Crate&Barrel). |
Here's a close-up of the cork tray -- it's a quick and easy project, if you have a lot of corks! Just buy a tray and use a hot glue gun to secure the corks! This tray (JoAnn) came white, so I painted it blue to coordinate with the chairs and add a pop of color. We thought it would be a fun way to display our many corks, including some of our favorites from Michigan, Indiana, and Napa wineries we have visited!


And here's a before & after of the console table. Dear friends gave us a table they weren't going to use (free is the perfect price!) and didn't mind if we painted it. I decided to keep the legs stained, since they tied in with the table and hutch, and paint the top. Hubby offered to build an extra shelf onto it, which turned out awesome:


As one more finishing touch, I wanted a table runner. I found this roll of burlap at Walmart for about five bucks and asked my MIL (who has an awesome sewing machine and is super talented) to embroider it for us -- it turned out really cute!

 |
| Serving our first meal in the new room :) |
Tuesday, August 26, 2014
Toddler Truth Tuesday
Today's little gem:
Jacob was watching one of the Land Before Time movies (not sure which one, as there are about 10,000 of them), and the little dinos were frolicking among geysers. He goes, "Hey, mommy, that water like at splash pad!"
:)
I have another post coming up later today, so that's it for now!
Jacob was watching one of the Land Before Time movies (not sure which one, as there are about 10,000 of them), and the little dinos were frolicking among geysers. He goes, "Hey, mommy, that water like at splash pad!"
:)
I have another post coming up later today, so that's it for now!
Tuesday, August 19, 2014
Toddler Truths Tuesday
It's that time again! I have a few other posts brewing, too, but I have to share a couple of super cute toddler truths today:
Jacob was spending the day with his grandma and uncle last week, and he got his khaki shorts wet in the lake. When they came inside, Grandma threw his shorts in the dryer for a bit. They went together to get them, she pulled them out, and Jacob (noticing the shorts' color) exclaimed:
"What?!? The dryer turned my shorts brown!"
We're not sure what color he thought they were before ;)
---
At dinner time with Mommy and Daddy, we were discussing Jacob's friends.
"Who is your best friend?" I asked.
(puzzled look)
"Daddy has best friends," hubby explained. "I have three best friends (meaning Jacob, Mommy, and our dog, Avery)."
Jacob was thoughtful for a moment, then responded:
"What?!?! You have three Jacobs?!?"
You can tell he's on a "What?!?" kick. It's pretty funny.
Jacob was spending the day with his grandma and uncle last week, and he got his khaki shorts wet in the lake. When they came inside, Grandma threw his shorts in the dryer for a bit. They went together to get them, she pulled them out, and Jacob (noticing the shorts' color) exclaimed:
"What?!? The dryer turned my shorts brown!"
We're not sure what color he thought they were before ;)
---
At dinner time with Mommy and Daddy, we were discussing Jacob's friends.
"Who is your best friend?" I asked.
(puzzled look)
"Daddy has best friends," hubby explained. "I have three best friends (meaning Jacob, Mommy, and our dog, Avery)."
Jacob was thoughtful for a moment, then responded:
"What?!?! You have three Jacobs?!?"
You can tell he's on a "What?!?" kick. It's pretty funny.
Friday, August 8, 2014
Sidewalk Painting!
Summertime means lots of outdoor, often messy, fun when you have a toddler! Yesterday we tried a DIY idea that I have seen floating around Pinterest lately: sidewalk chalk paint. It's not an original idea by any means, but it was a success (as measured by Jacob's excitement!), so I want to share :)
Jacob LOVES to "do projects," which means to do anything that he sees Mommy & Daddy (especially Daddy) doing around the house. Painting is one of those things; we've painted several items lately, and he was SO excited to paint!
First, you need to make your chalk paint. There are many tutorials online for this (I like this one), but it's super easy. Basically, take some old sidewalk chalk, crush it up into a powder, add water, and stir. That's it. Chalk paint! They do sell chalk paint powder in containers resembling paint cans, but it's so easy and cheap to make it yourself, especially if you already have old, broken chalk pieces; I decided to save a few bucks on the paint and get Jacob some other supplies.
I will say that I didn't do the best job crushing it into a fine powder (I put the chalk in a plastic bag and pounded it with a meat tenderizer mallet -- a hammer might be better). Tiny lumps aren't a big deal, but our paint was a bit lumpier than I would have liked. Jacob didn't notice, though!
 |
| All ready to get started! I picked up the mini paint pan, brush, and set of textured rollers at Walmart for about $3.50 total, so that he could feel like a real painter! The pan and brush were with the painting supplies, and the rollers were in the kids' art supply aisle. I already had the little stencil sponge brush, which turned out to be perfect for making polka dots! |
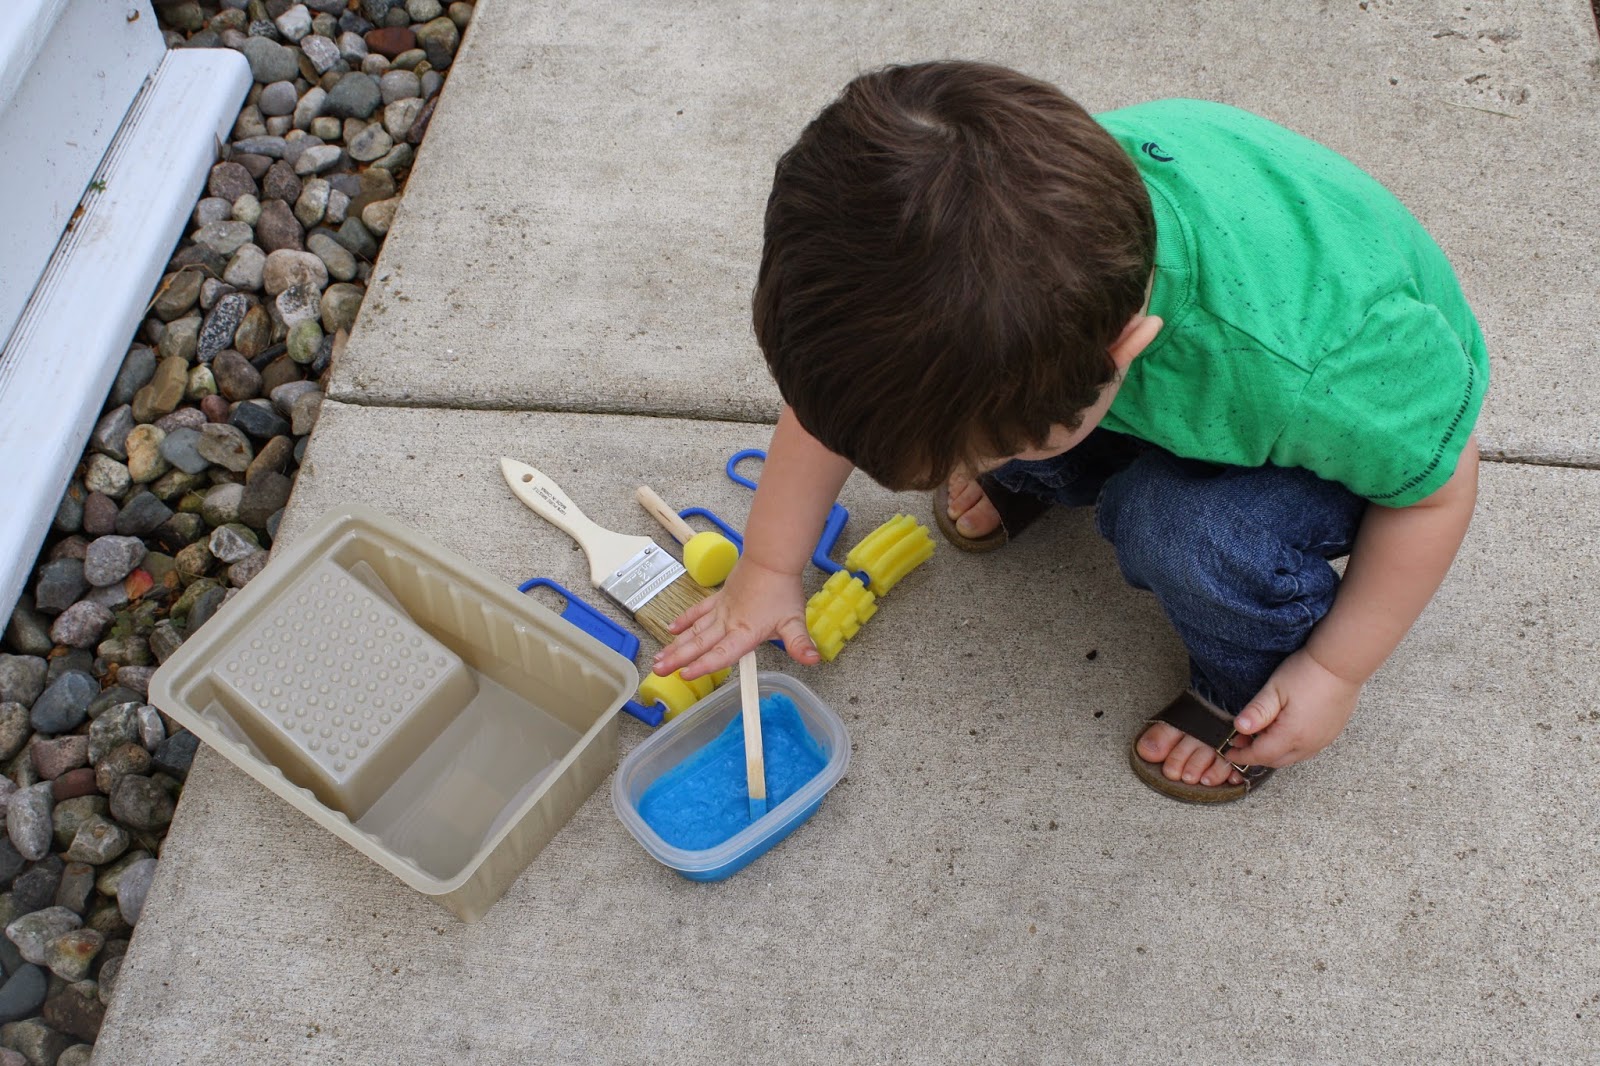 |
| helping to stir the paint |
 |
| ...and he's off! The textured rollers were really fun; he loved making "tracks." |
 |
| You could always just use a plastic bowl and regular art brushes for this, but the paint pan and rollers were a huge hit with him because he felt like a grown up -- I highly recommend some "real" painting tools :) Later, after I washed everything, he used the dry rollers to "paint" the siding and windows of the house," so they were great for pretend, too! Additionally, you could put plain water in the paint pan and let kids "paint" with water. I plan to try this sometime when we don't have the time or energy for the chalk mess, as I imagine the textured sponge rollers will still make tracks with plain water. |
 |
| "Stamping dots" was really fun. |
 |
| "Look mom, blue hands!" Of course he had to paint himself, too ;) |
 |
| This activity was a bit messier than I expected (although I was naive to expect anything different with this boy!), so it may be smart to have your kids wear old clothes and washable shoes or bare feet ;) The good news is that chalk washes off pretty easily! |
Subscribe to:
Posts (Atom)